

저번에 만들어두었던 header, footer 컴포넌트를 사용
[React] 컴포넌트 활용하기_헤더와 풋터 만들기
위쪽 헤더부분을 컴포넌트로 만들어서 App.js 혹은 원하는 페이지에서 import 하여 이렇게 간편하게 사용 할 수 있습니다. header import React from 'react'; import './style.css'; export default function Header() { return
narii.tistory.com
Board의 구조는

이렇게 크게 3개의 컴포넌트로 나누었습니다.
가장 작은 단위 post 하나를 표현하는 boardPost에는
BoardPost.js
function BoardPost(props) {
    const [showContent, setShowContent] = useState(false); // 내용 토글 기본false

    // 제목 클릭 시 내용을 토글하는 함수
    const toggleContent = () => {
      setShowContent(!showContent);
    };

    return (
        <div className="post" id={`post-${props.id}`}>
        <div className="post-header" onClick={toggleContent}>
          <span className="post-id">{props.id}</span>
          <span className="post-title">{props.title}</span>
          <span className="post-user">{props.user_name}</span>
        </div>
        {showContent && <div className="post-content">{props.content}</div>}
        {props.file && <div className="post-file">{props.file}</div>}
      </div>
      );
  }

export default BoardPost;
BoardPost 컴포넌트를 받아서 List로 만들어주는 BoardList에서는
BoardList.js
import BoardPost from "../BoardPost";

/** 게시판 리스트 */
function BoardList() {
  const [posts, setPosts] = useState([]); // 게시글 목록을 저장할 상태
  const [isFormOpen, setIsFormOpen] = useState(false); // 폼의 토글 상태

  /**Posting 컴포넌트에서 refresh 사용하기 위해 */
  const handlePostSuccess = () => {
    getBoardData(); // 게시글 목록 갱신
  };

  useEffect(() => {
    getBoardData();
  }, []);

  const getBoardData = () => {
    fetch("api/board", {
      headers: {
        Accept: "application / json",
      },
      method: "GET",
    })
      .then((response) => {
        if (!response.ok) {
          throw new Error("Network response was not ok");
        }
        return response.json();
      })
      .then((data) => {
        // 서버에서 받은 데이터로 상태를 업데이트합니다.
        setPosts(data);
      })
      .catch((error) => {
        console.error("Error fetching data:", error);
      });
  };

  //리스트의 결과를 result에 저장
  const result = posts.map((data) => (
    <BoardPost
      key={data.id}
      id={data.id}
      title={data.title}
      content={data.content}
      user_name={data.user_name}
      file={data.file}
    />
  ));

  return (
    <div className="board-list">
      <div className="boardListHeader">
        <h2>게시글 목록</h2>
      <button className="postingBtn" onClick={() => setIsFormOpen(true)}>글쓰기</button></div>
      {isFormOpen && (
        <PostForm refresh={handlePostSuccess} closeForm={() => setIsFormOpen(false)}/>)}
      {result.length > 0 ? result : <p>게시글이 없습니다.</p>}
    </div>
  );
}
데이터들을 불러와
map을 돌려 리스트를 만들어줍니다.

글쓰기 버튼을 누르면 PostingPage가 활성화 됩니다!!

PostForm 컴포넌트는 BoardList와 한페이지에 작성했고,
BoardList에서 PostForm 컴포넌트를 호출해주었고,
import BoardPost from "../BoardPost";

/** 게시판 리스트 */
function BoardList() {
  const [posts, setPosts] = useState([]); // 게시글 목록을 저장할 상태
  const [isFormOpen, setIsFormOpen] = useState(false); // 폼의 토글 상태

  /**Posting 컴포넌트에서 refresh 사용하기 위해 */
  const handlePostSuccess = () => {
    getBoardData(); // 게시글 목록 갱신
  };

  useEffect(() => {
    getBoardData();
  }, []);

  const getBoardData = () => {
    fetch("api/board", {
      headers: {
        Accept: "application / json",
      },
      method: "GET",
    })
      .then((response) => {
        if (!response.ok) {
          throw new Error("Network response was not ok");
        }
        return response.json();
      })
      .then((data) => {
        // 서버에서 받은 데이터로 상태를 업데이트합니다.
        setPosts(data);
      })
      .catch((error) => {
        console.error("Error fetching data:", error);
      });
  };

  //리스트의 결과를 result에 저장
  const result = posts.map((data) => (
    <BoardPost
      key={data.id}
      id={data.id}
      title={data.title}
      content={data.content}
      user_name={data.user_name}
      file={data.file}
    />
  ));

  return (
    <div className="board-list">
      <div className="boardListHeader">
        <h2>게시글 목록</h2>
        <button className="postingBtn" onClick={() => setIsFormOpen(true)}>
          글쓰기
        </button>
      </div>
      {isFormOpen && (
        <PostForm
          refresh={handlePostSuccess}
          closeForm={() => setIsFormOpen(false)}
        />
      )}
      {result.length > 0 ? result : <p>게시글이 없습니다.</p>}
    </div>
  );
}

/**글쓰기 */
function PostForm({ refresh, closeForm }) {
  //포스팅 저장 후 페이지를 리렌더링하기 위해 getBoardData를 가져옴
  const [postUserName, setPostUserName] = useState("");
  const [postTitle, setPostTitle] = useState("");
  const [postContent, setPostContent] = useState("");
  const [postFile, setPostFile] = useState(null); // 파일 상태

  /** file 타입 저장 */
  const handleFileChange = (event) => {
    setPostFile(event.target.files[0]); // 첫 번째 선택된 파일을 저장
  };

  /**저장하기 */
  const handleSubmit = () => {
    if (postTitle.trim() && postContent.trim() && postFile) {
      const formData = new FormData();
      formData.append("name", postUserName);
      formData.append("title", postTitle);
      formData.append("content", postContent);
      formData.append("file", postFile); // 파일 데이터 추가

      fetch("api/posting", {
        method: "POST",
        body: formData, // JSON이 아닌 FormData 사용
      })
        .then((response) => {
          if (!response.ok) {
            throw new Error("Network response was not ok");
          }
          return response.json();
        })
        .then((data) => {
          console.log("Post created successfully", data);
          alert("게시글이 성공적으로 작성되었습니다!");
          refresh(); // 게시글 리렌더링

          // 입력 필드를 초기화합니다.
          setPostUserName("");
          setPostTitle("");
          setPostContent("");
          setPostFile(null); // 파일 입력 필드를 초기화합니다.
        })
        .catch((error) => {
          console.error("Error creating post:", error);
        });
    } else {
      alert("Title, content, and file are required!");
    }
  };

  return (
    <div className="postFormBox">
      <h2>글쓰기</h2>
      <div className="post-form">
        <input
          className="userNameInput"
          value={postUserName}
          onChange={(e) => setPostUserName(e.target.value)}
          placeholder="작성자"
        />

        <input
          className="postTitleInput"
          value={postTitle}
          onChange={(e) => setPostTitle(e.target.value)}
          placeholder="제목"
        />
        <textarea
          className="postContentInput"
          value={postContent}
          onChange={(e) => setPostContent(e.target.value)}
          placeholder="내용"
        />
        <input
          type="file"
          className="fileInput"
          onChange={handleFileChange}
          placeholder="파일"
        />
        <div className="button-container">
          <button type="button" className="formSubmitBtn" onClick={handleSubmit}>
            저장
          </button>
          <button
            typq="button"
            className="closeBtn"
            onClick={() => closeForm(false)}
          >
            취소
          </button>
        </div>
        {/* <ImageUpload /> */}
      </div>
    </div>
  );
}

export { BoardList, PostForm };
그리고 BoardPage에서는
컴포넌트만 호출해주었습니다!!
import { BoardList } from '../BoardList/index';

function BoardPage() {
  return (
    <div>
      <BoardList />
    </div>
  );
}

export default BoardPage;
express 서버 PORT 4000으로 열어주고, (코드는 생략)
proxt 세팅을 해줍니다!! 꼭!!!!!
router 세팅
const express = require('express');
const app = express();
const cors = require('cors');
const router = express.Router();
const { pool} = require('../dbConfig_maria');
const multer  = require('multer');
const path = require('path');

//파일이 저장 된 디렉토리 경로
const fileDir = path.join(__dirname, '..', 'fileDir');

app.use(express.json());
app.use(cors());
app.use('/files', express.static(fileDir)); // '/files' 경로로 정적 파일 제공 설정

// Multer 설정 부분
const storage = multer.diskStorage({
  destination: function(req, file, cb) {
    cb(null, fileDir) //
  },
  filename: function(req, file, cb) {
    cb(null, Date.now() + '-' + file.originalname) // 파일 이름을 현재 시간과 원래 파일 이름으로 구성합니다.
  }
})


const upload = multer({ storage: storage })

  //리스트 불러오기
   router.get('/board', (req, res) => {
      pool.query('SELECT * FROM tb_test', (err, data) => {
        if (!err) {
          res.send(data)
        } else {
          console.log(err);
        }
      });
    });


  //포스팅
  router.post('/posting', upload.single('file'), (req, res) => {
    console.log("내용 : ",req.body); // form fields
    console.log("파일이름 : ",req.file); // form file
    const {name, title, content} = req.body;
    const file = req.file ? req.file.filename : null;
    const query = `INSERT INTO tb_test (user_name, title, content, file_name) VALUES (?, ?, ?, ?)`
    const values = [name, title, content, file];
    console.log("file : " + file, "title : " + title, content) ;
    pool.query(query, values, (error, result) => {
      if (error) {
        console.log("error : " + error)
      } else {
        res.send(result);
      }
    });
    console.log("정상 종료");
  });
file의 이름을 db에 저장하고,
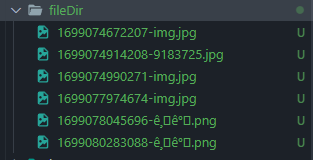
파일은 로컬에 fileDir라는 폴더를 만들어서 저장하도록 했습니다.

DB에도 잘 저장되고 있습니다.
테스트를 많이했었구나
얘도 마음처럼 되지 않았나보다.
하지만 파일서버는 아직도 나에겐 오로라 같은 존재다.
그래서 파일서버 세팅 방법은 공유 못할것같다 내가 감히 표현할수가 없어서 ㅈㅅ
'REACT' 카테고리의 다른 글
| Insert `,` prettier/prettier 오류 (0) | 2023.12.28 |
|---|---|
| [리액트] 파일 업로드 한글 깨지는 이유, 해결방법 (0) | 2023.11.21 |
| 리액트_오류_This component must be used inside a <RecoilRoot> component. (0) | 2023.09.21 |
| 리액트_자바스크립트_연락처 10자리 11자리 12자리 지역번호02 정규식 (0) | 2023.09.19 |
| [React] 컴포넌트 활용하기_헤더와 풋터 만들기 (0) | 2023.09.14 |